
 It Works Locally
Stop Losing Your Cursor on macOS
On a high-resolution display, the default Mac cursor tends to disappear. Move quickly across a large monitor, or switch from a dark app to a light one. Suddenly you are searching for a tiny white arrow on the screen. Shaking the mouse to trigger the "find my cursor" magnification is a common reflex.
It takes less than a minute to fix.
Prefer to watch? Skip to the video
Why the default cursor is hard to see
macOS comes with a cursor designed for typical, lower-resolution screens. On a Retina or other high-resolution screen — particularly at larger resolutions or when using an external monitor — it ends up looking much smaller than everything around it.
The default white fill with a thin black outline does not help either. It blends into light-coloured sidebars, white documents, and bright web pages. On a dark background it is fine, but most interfaces don't have dark backgrounds.
How to fix it
The controls you need are in Accessibility, not in the standard Mouse or Trackpad settings.
- Open System Settings
- Go to Accessibility (the blue icon with a person in a circle)
- Select Display
- Scroll down to the Pointer section
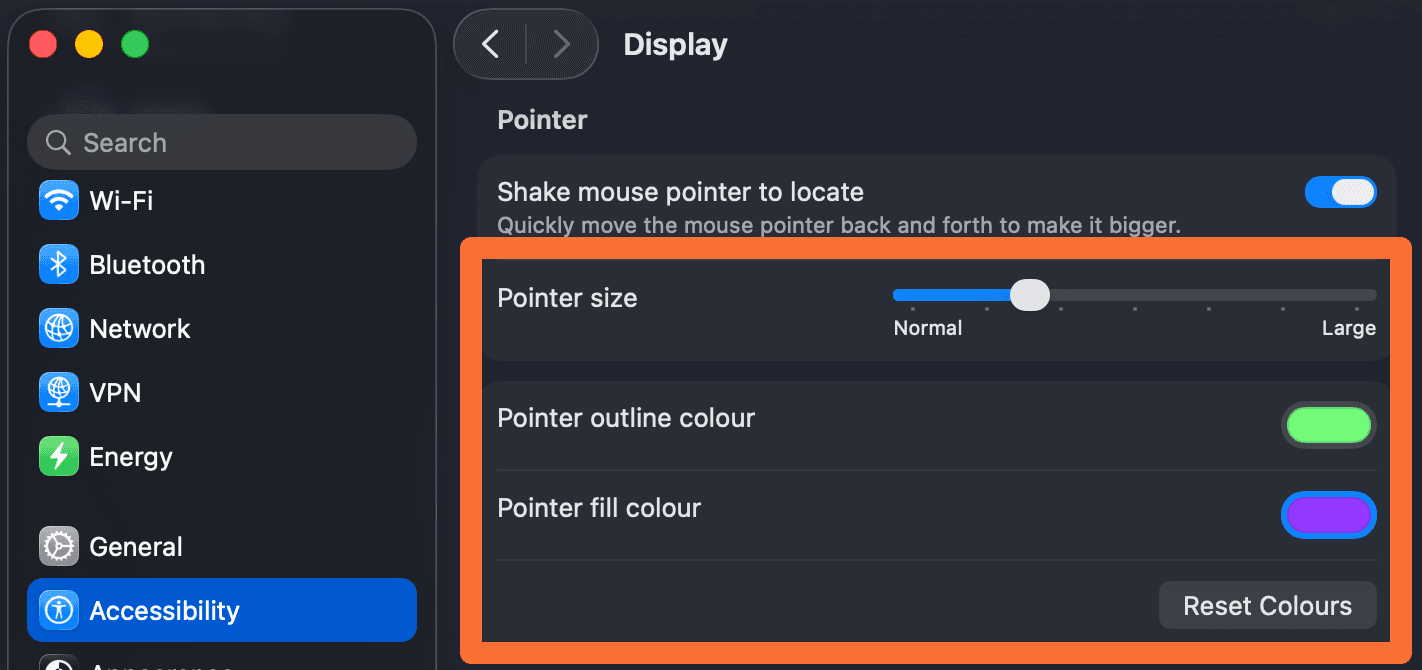
You will find three things to adjust:
- Pointer Size — drag the slider until the cursor feels obvious at a glance. The right size is whatever you can see without searching for it.
- Pointer Outline Color — the border around the cursor. A high-contrast colour here helps it stand out across both light and dark backgrounds.
- Pointer Fill Color — the interior of the cursor. Pick something distinct from the outline and you end up with a two-tone cursor that is genuinely hard to miss.
A green outline with a purple fill might sound over the top, but the goal here is not to be subtle — it is to never lose your cursor again.
Watch the video
The full walkthrough, including before and after: